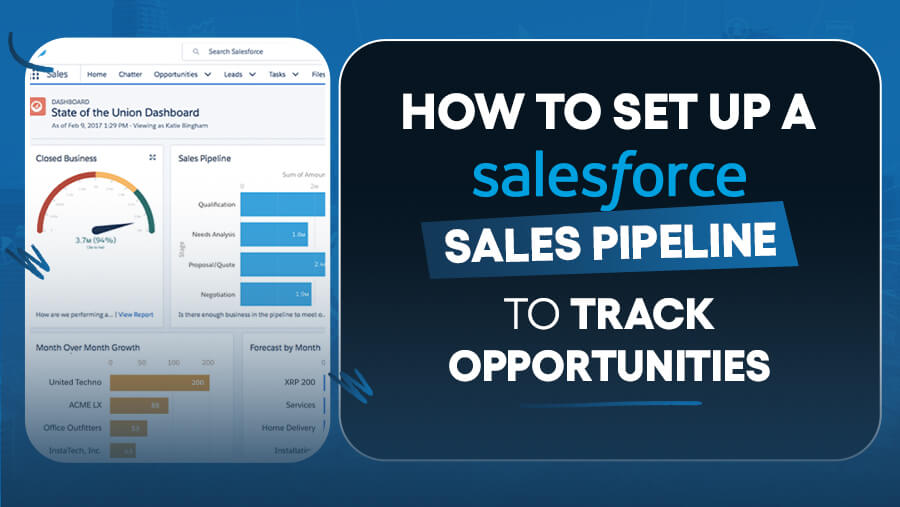
How to Set Up a Salesforce Sales Pipeline to Track Opportunities
Anisha

Here’s something to mull over: companies that switch to Salesforce see a 25% increase in marketing ROI and a 25% boost in revenue growth.
What does this imply?
Besides serving as a tool for storing contacts, Salesforce is a system designed to help you track opportunities, improve sales performance, and grow revenue.
A well-structured sales pipeline is at the heart of this. With clear stages and the right setup, you can track every deal, focus on the right opportunities, and guide your team toward closing more sales.
This guide will show you how to set up your Salesforce sales pipeline step by step so you can start tracking opportunities in a way that drives tangible results.
How to Set Up Your Salesforce Sales Pipeline
So, how can you set up your Salesforce sales pipeline? Here are the steps:
Step 1. Prepare for the Setup
Before setting up your sales pipeline in Salesforce, it’s important to establish a clear foundation to ensure the system meets your team’s specific needs.
1. Define Your Sales Process
To create a functional pipeline, start by mapping out the stages of your sales process. Each stage represents a step that opportunities will pass through, from initial contact to a closed deal.

Collaborate with your sales team to ensure the process reflects your real-world workflow. Tailor the stages to match your business type, whether B2B, SaaS, or another model. This step ensures consistency and clarity across the organization.
2. Identify Key Metrics to Track
Metrics allow you to measure your sales pipeline's effectiveness and identify areas for improvement. Decide early on which data points matter most for your business.

Align these metrics with your sales team’s objectives, such as increasing win rates, shortening sales cycles, or focusing on higher-value opportunities. Clear metrics lead to more actionable insights.
3. Clean and Organize Your Data
Salesforce is only as effective as the data you feed into it. Start with a thorough data cleanup to avoid unnecessary clutter and inaccuracies in your pipeline.
Steps to Clean Your Data:
- Review Existing Data: Audit your current CRM or spreadsheet for outdated or irrelevant entries.
- Update Incomplete Records: Fill in missing fields, such as contact information or deal values.
- Eliminate Duplicates: Merge or delete duplicate entries to avoid confusion.
Organized data ensures a seamless pipeline setup and reduces errors during daily operations. Starting with a clean slate saves time and boosts team confidence.
Step 2. Configure the Salesforce Sales Pipeline
With your prep work done, it’s time to configure your Salesforce sales pipeline. Here’s how:
1. Customize Sales Stages
The backbone of your pipeline is the sales stages. These stages mirror the steps in your sales process and help everyone track the progression of deals.
Steps to Customize Sales Stages:
- Define each stage of your process (e.g., Prospecting, Qualification, Proposal, Negotiation, Closed-Won/Closed-Lost).
- Assign clear criteria for when opportunities move from one stage to the next.
- Example: A deal moves from “Qualification” to “Proposal” when the client confirms a demo or discovery call.
- Use Salesforce’s Path feature to guide users through each stage with visual prompts and recommendations.
Pro Tip: Regularly review these stages with your team to ensure they reflect real-world workflows and adapt to changes in your sales strategy.
2. Set Up Opportunity Records
Opportunity records are the foundation for tracking deals. Customize these records to capture the information that matters most to your business.
Mandatory Fields for Opportunity Records:
- Opportunity Name: A unique identifier for each deal.
- Stage: The current stage of the opportunity.
- Deal Size: The estimated value of the opportunity.
- Close Date: The expected date to close the deal.
Custom Fields to Add:
- Industry: To segment opportunities by client type.
- Lead Source: To track the deal's origin (e.g., referral, ad campaign).
- Competitor Name: To monitor competitive trends.

Using standardized templates ensures consistency and reduces errors in data entry across the team.
3. Implement Validation Rules
Validation rules prevent incomplete or incorrect data from moving through your pipeline, ensuring data integrity.
How to Use Validation Rules:
- Define Key Criteria: Specify which fields must be completed before advancing to the next stage.
- Example: A deal cannot move to “Proposal” without a confirmed budget entered in the “Budget” field.
- Make Critical Fields Mandatory: Include essential information like contact details, close date, or next steps to minimize delays in deal progression.
Example Validation Rule:
IF “Budget” is blank, the opportunity cannot progress beyond the “Qualification” stage.
This approach helps enforce data discipline and ensures everyone follows the agreed-upon sales process.
4. Build Your Opportunity Pipeline View
A well-organized pipeline view gives your sales team instant access to key deal information, helping them prioritize effectively.
Steps to Customize the Pipeline View:
- Choose Display Fields: Include essential data such as stage, deal size, close date, and owner.
- Group Opportunities by Stage: Use Salesforce’s Kanban view for an intuitive drag-and-drop interface.
- Apply Filters: Segment opportunities for better visibility.

Customizing filters lets your team quickly locate the information they need, whether it’s opportunities by region, rep, or closing timeline.
Step 3. Automate and Enhance Your Pipeline
Once your pipeline is set up, leverage Salesforce’s automation tools to streamline tasks, improve efficiency, and ensure nothing falls through the cracks. Here’s how to enhance your pipeline:
1. Automate Routine Tasks with Workflows
Salesforce workflows help eliminate repetitive manual tasks, allowing your sales team to focus on closing deals.
What to Automate:
- Automatically assign leads to sales reps based on territory or industry.
- Notify managers when opportunities reach specific stages, such as “Negotiation” or “Closing.”
- Trigger follow-up email sequences when a deal has been inactive for a certain period.

Use tools like Salesforce Flow or Process Builder to customize workflows to fit your team’s needs.
2. Create Custom Dashboards
Dashboards transform raw data into visual insights, giving your team a clear view of pipeline health and sales performance.
Essential Dashboards to Build:
- Pipeline by Stage: Tracks the number and value of deals at each stage in real-time.
- Won vs. Lost Deals: Compares successful and unsuccessful opportunities to uncover patterns.
Key Sales Dashboards for Success
- Pipeline Overview
- Metrics: Deals by stage, total pipeline value.
- Purpose: Spot bottlenecks and track progression.
- Rep Performance
- Metrics: Deals won, revenue contribution, activity count.
- Purpose: Identify top performers and coaching opportunities.
- Deal Trends
- Metrics: Won vs. Lost ratios, conversion rates.
- Purpose: Pinpoint trends to refine your strategy.
3. Set Up Alerts and Notifications
Real-time alerts keep your team proactive by flagging meaningful opportunities or actions.
How to Use Alerts:
- Notify sales reps when a deal’s close date is approaching within 7 days.
- Set alerts for deals without logged activity for more than 14 days.
Example: A rep receives an email notification when a key opportunity has no scheduled follow-up.
4. Leverage AI with Salesforce Einstein
Salesforce Einstein uses artificial intelligence to uncover insights and provide recommendations to boost performance.
How Einstein Enhances Your Pipeline:
- Predictive Analysis: Identify opportunities most likely to close based on historical trends.
- Insights: Highlight at-risk deals so reps can take action proactively.
- Scoring: Score leads and opportunities to prioritize efforts.
Example: Einstein predicts that a deal in “Proposal” has an 80% chance of closing based on its size, industry, and similar successful deals.
Step 4. Maintain Your Salesforce Sales Pipeline
A well-maintained pipeline ensures your sales process remains efficient, accurate, and aligned with your team’s goals. Here’s how to keep your Salesforce sales pipeline in top shape:
1. Regularly Clean Up Data
An accurate pipeline starts with clean data. Regular maintenance prevents clutter and ensures your team works with reliable information.
How to Clean Up Your Pipeline:
- Archive Inactive Opportunities: Move outdated or abandoned opportunities out of the pipeline to focus on active deals.
- Routine Data Audits: Schedule monthly or quarterly reviews to eliminate duplicate entries and fill in missing information.
- Standardize Data Entry: Use predefined fields and templates to ensure consistency across the team.
Pro Tip: Automate data hygiene tasks with tools like Salesforce’s Duplicate Management feature.
2. Refine Sales Stages as Needed
Your pipeline should evolve with your sales process and industry trends. Regular feedback from your team can uncover opportunities for improvement.
Steps to Refine Your Pipeline:
- Gather Feedback: Ask sales reps about common bottlenecks, unnecessary steps, or unclear stages.
- Adapt to Changes: Adjust stages to reflect new sales strategies, buyer behaviors, or market conditions.
- Streamline the Process: Eliminate redundant stages to reduce complexity and improve deal movement.
Example: If most deals stall in the “Negotiation” stage, add a substage like “Proposal Sent” to track progress more accurately.
3. Provide Ongoing Training for Your Team
Even with a robust system, your pipeline’s effectiveness depends on how well your team uses it. Ongoing training ensures everyone is on the same page.
Key Training Areas:
- Pipeline Updates: Teach reps to update deal statuses, log activities, and maintain accurate records.
- Automation Tools: Train your team to use workflows, alerts, and dashboards to save time and improve efficiency.
- New Features: Schedule refresher sessions whenever Salesforce introduces new features or tools.
Pro Tip: Use Salesforce’s built-in Trailhead platform to deliver engaging, hands-on training modules for your team.
4. Monitor Key Metrics
Tracking and analyzing pipeline metrics helps you identify trends, optimize processes, and improve sales performance.
Key Metrics to Monitor:
- Close Rates: Measure how many opportunities convert into deals to evaluate sales effectiveness.
- Average Deal Size: Understand revenue potential and focus on high-value opportunities.
- Stage Conversion Rates: Identify where deals drop off and take action to address issues.
- Sales Velocity: Track how quickly deals move through the pipeline to spot inefficiencies.
Pro Tip: Use Salesforce dashboards to visualize these metrics and create custom reports for deeper analysis.
Conclusion
Setting up a Salesforce sales pipeline is the foundation for tracking opportunities and improving sales performance.
With a straightforward process, automation, and regular maintenance, your team will stay focused on what matters most—closing deals. Start setting up your pipeline today for better visibility, efficiency, and results.
News Letter
Subscribe our newsletter to get our
latest update & news


